Presets are a series of predefined settings that can be applied to a photo, and in Luminar AI/Neo, these presets are called Templates.
For this article, we handpicked 12 of the best free Luminar presets, including seven downloadable Templates and five Templates that are included in the Luminar AI/Neo software.
Please note that these presets are designed for Luminar AI/Neo. Luminar 4 is now considered legacy software and has different preset files. The Templates should work on the newer Luminar Neo, which uses the same underlying interface and software.
At the end of the article, we include a full guide on how to install Luminar presets.
We’ll demonstrate each preset using this photo:

Best Free Luminar Presets:
When you buy through links on our site, we may earn a commission at no cost to you. We evaluate products independently. Commissions do not affect our evaluations.
Best Free Luminar Presets
1. Creative
Our first Luminar preset is Creative. This is a fantastic free Template created by the team at Presetpro. The preset does numerous things to your images.
It primarily boosts the underlying saturation of all colors. This makes your photos much more vibrant and attractive. Due to the highlights, shadows, and contrast adjustments, the Creative Template also gives images a slightly retro feel.

If you have a series of photos that look relatively flat and dull, the Creative filter could work wonders. It can add much-needed color to photos and change the mood completely.
2. Kyoto
Not all Luminar AI Templates are instantly noticeable. Some are subtle and can improve the quality of your images without making them look unrealistic.

One of the best free Luminar presets therefore is Kyoto by Presetpro. It’s a subtle Template, one that we would use if we wanted to boost the basic quality of our RAW photos. With the Kyoto Template applied, we would be confident that we could export them and share them on social media.
Kyoto does boost the colors somewhat, but it mainly affects the contrast and clarity. Compared to the original, your photos will look bolder and more detailed.
Related Posts
3. Amore
There are plenty of Luminar AI presets that can be used for basic edits. Oftentimes, you simply want to edit photos quickly without spending time tweaking individual parameters. Amore is a great preset that can be used for this.
It boosts the basic quality of your images and improves colors. Shadows are reduced, and it generally creates a balanced look.

4. Lomography
It can be tricky to create a retro-style image, and that is why presets like Lomography are so useful. Lomography is another fantastic Luminar AI Template created by Presetpro.
It turns your photos into bright retro images with pastel colors. As you can see from the example, the shadows have been boosted to the max, and the overall image is light with minimal shadows.

The preset adds more detail to photos, but the change in colors also creates an interesting atmosphere. We would say that the Lomography preset works better on photos that are initially brighter. If the image is too dark, the increased highlights may produce a bland result.
5. Twilight
If you want to create a cinematic effect with amazing colors, then you should check out Twilight by Presetpro.
This free preset boosts the colors and saturation of your photos and makes them pop. As you can see in the sample photo, the sky looks fantastic – as do the shops, vehicles, and ground colors.

Also, the contrast is lower and the shadows have increased. Like the Movie Grade Template below, this creates a consistent look and makes for an even photo. The Twilight preset could be great for producing cinematic effects without losing too much color.
6. Movie Grade
Movie Grade is another preset by Presetpro. It is a simple option that doesn’t do a whole lot to photos. Edited images still have plenty of colors, but the saturation is subtly reduced. In the example below, you can see that the blues of the sky are a little muted.
This creates a movie-like quality without making the photo retro. The shadows are also greatly reduced, and overall, the Movie Grade Template reduces contrast and makes images look more consistent in light and dark areas.

7. Instant Film
Instant Film is one of the best ways to create a retro film effect. It can be desirable to create photos that look like old film camera shots from bygone eras. These photos can be useful for marketing and look fantastic on social media, too.
Instant Film adds a haze to images and reduces the contrast. It’s difficult to explain, but there is something special about the resulting photos; they look so cool and retro.
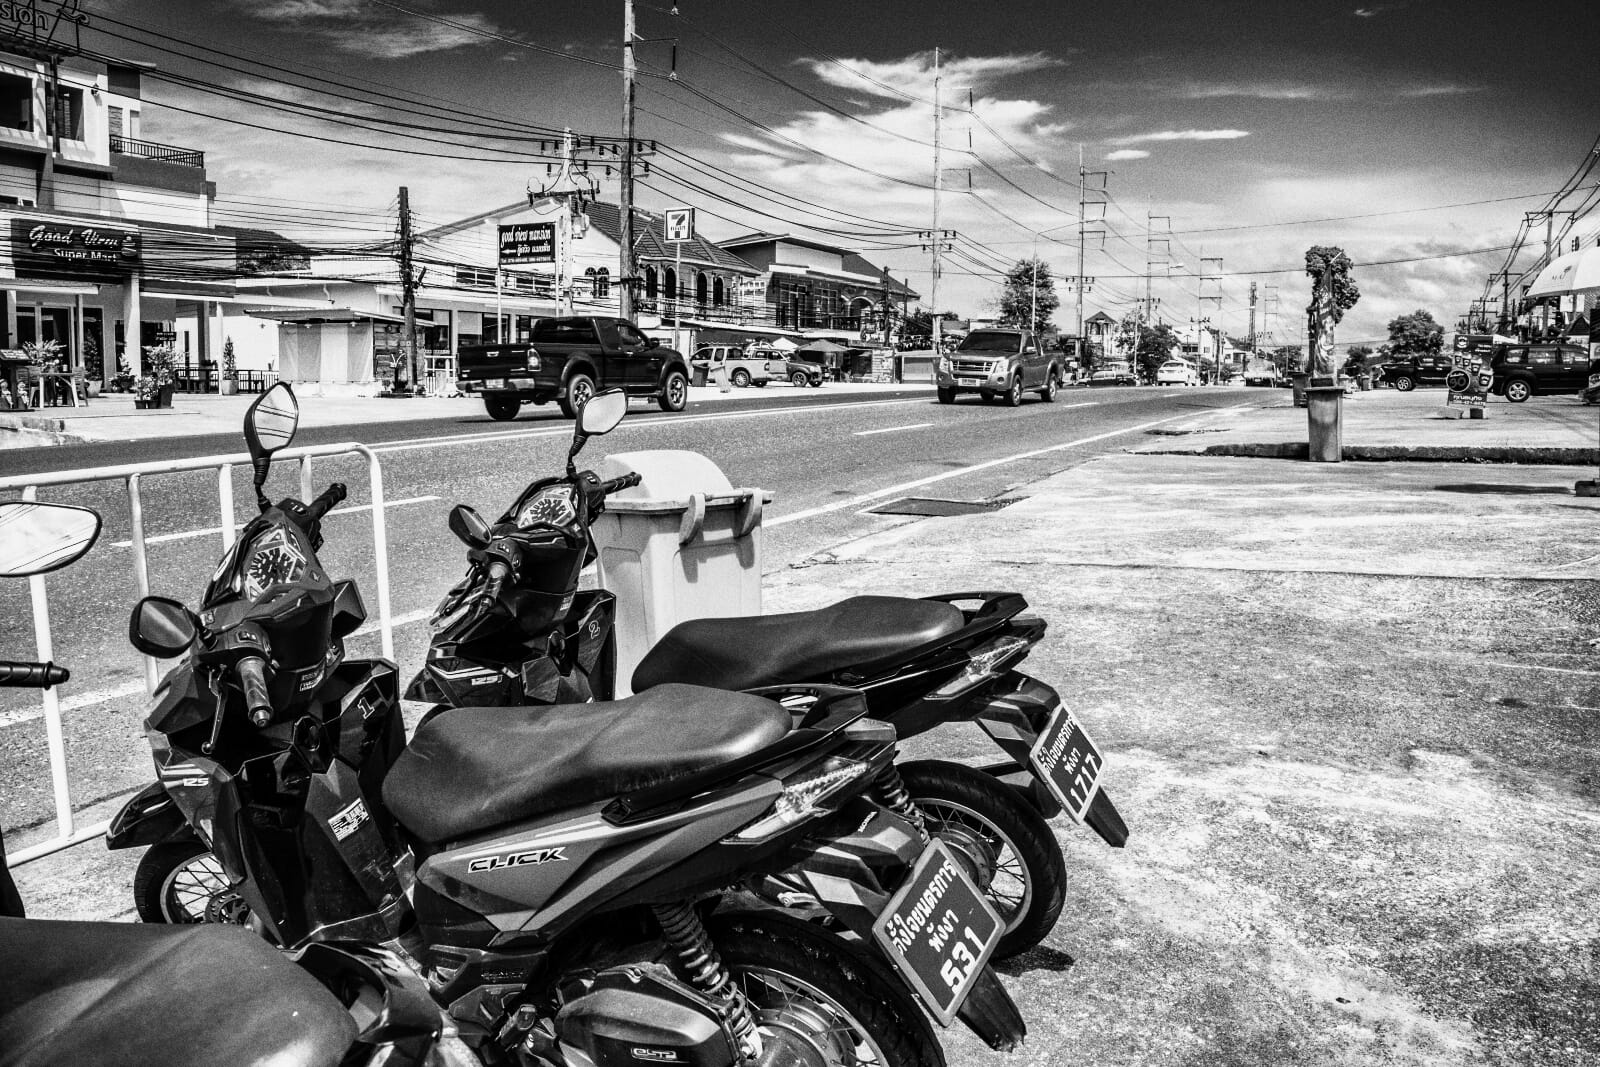
8. Film Noir (Included in Luminar AI)
There is nothing quite like a striking black and white photo, and that’s why Film Noir is one of the best free Luminar presets available for Luminar AI. This Template is included in Luminar, and you can find it with the following path:
Templates > Cinematic > Blockbuster > Film Noir
The effect of this Template is plain to see. It transforms your photos into striking black and white shots that feature spectacular detail and contrast. While some B&W shots blur the lines between the tones, the Film Noir Template emphasizes both the blacks and the whites. The results look superb.

9. Travelogue (Included in Luminar AI)

Another of our favorite Luminar AI Templates is Travelogue. It gives photos a gritty, retro, and realistic look. In fact, it almost gives a stormy, grungy feel to images, particularly if those images have a lot of sky.
To use this Template, follow this path:
Templates > Cinematic > Big Screen Collection > Travelogue
As the category name suggests, Travelogue has a certain movie quality to it. The edits remind us of post-apocalyptic movies like The Book of Eli. One of the main features of this preset is the reduced saturation. It actually reduces the colors to create a retro, grungy atmosphere.
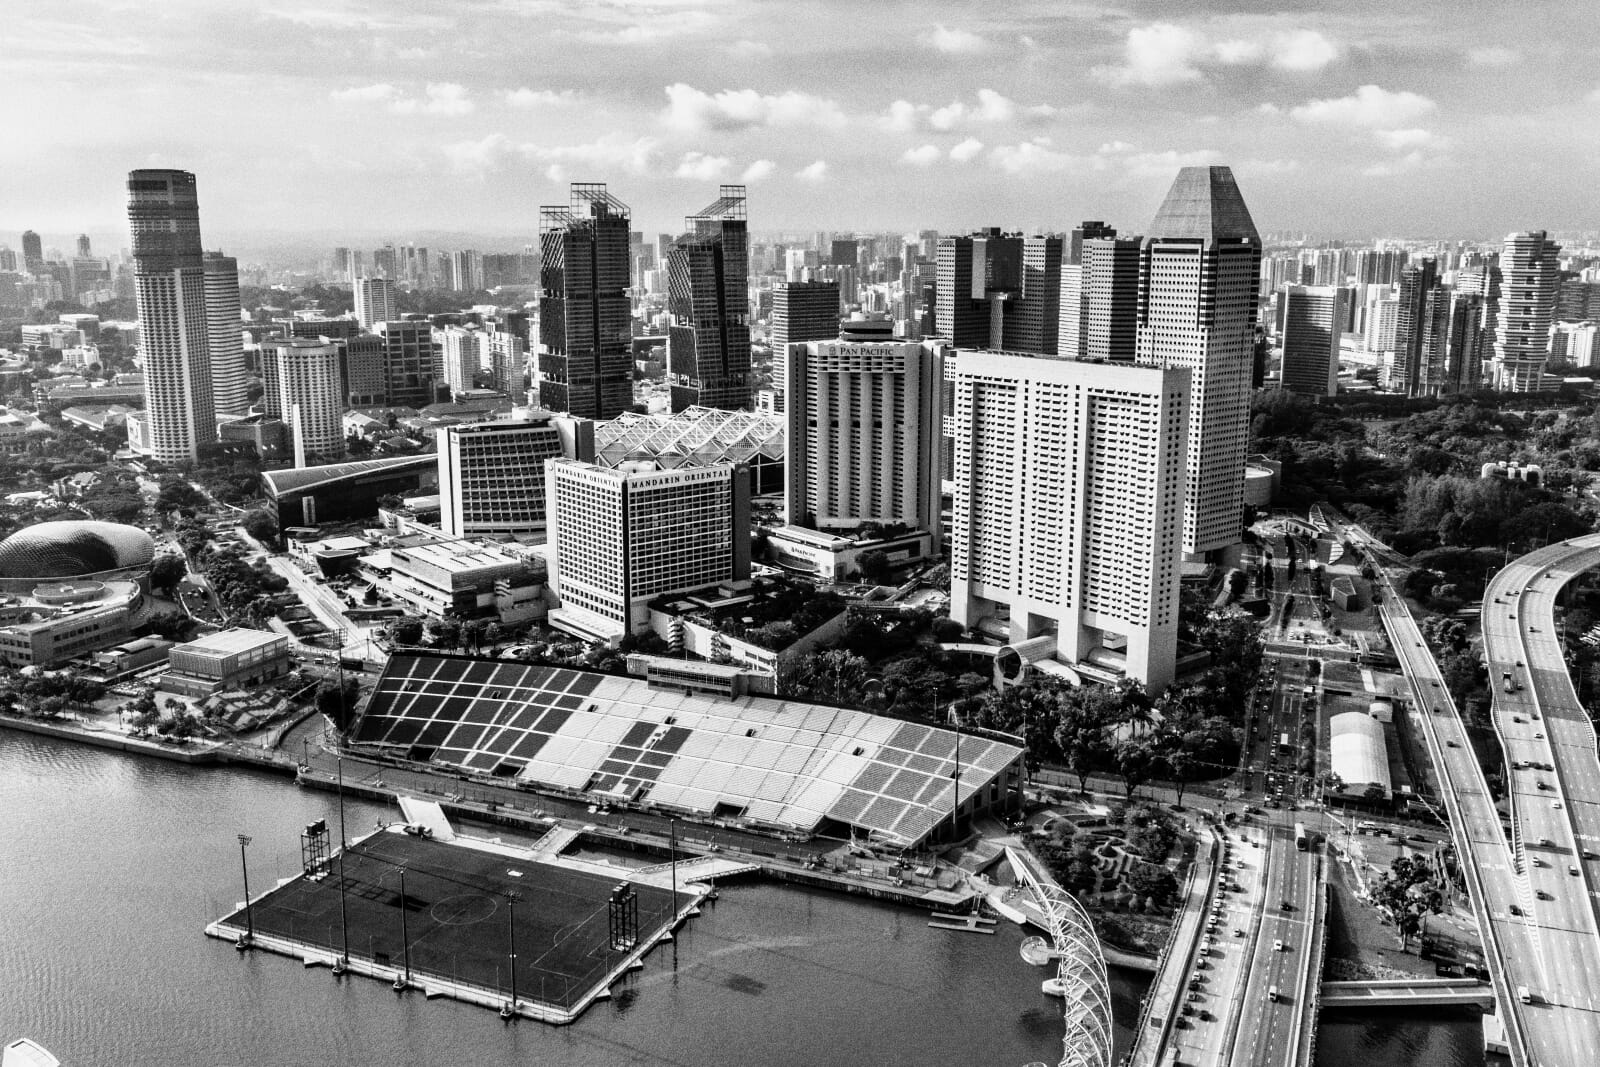
10. City Thrills (Included in Luminar AI)
Not all edits have to be bright and vibrant. You can also edit photos to make them look gritty, realistic, and sharp. The City Thrills edit achieves this.
This is another Template that comes with Luminar AI, and you can find it here:
Templates > Landscape > Big City Lights > City Thrills

This Template adds plenty of clarity and contrast to your photos and makes objects appear far more detailed. While most Templates boost colors, the City Thrills Template actually reduces the vibrance slightly. This helps create a grounded feel. It also applies a subtle vignette to the corners of the frame.
11. Electric City (Included in Luminar AI)
We have a soft spot for creating retro photos that look like they were taken in another era, and the Electric City Template does just that! It’s one of the free Templates included with Luminar AI and is located here:
Templates > Landscape > Big City Lights > Electric City
As you can see from the example below, Electric City gives photos a faded look. The colors are tinted and somewhat aged, which is achieved via saturation and hue adjustments – in particular, the overall hue is shifted toward purple/pink.

12. Fast Fix (Included in Luminar AI)
Fast Fix is another preset included in Luminar; you can find it here:
Templates > Essentials > Scenery > Fast Fix
The Fast Fix Template fixes the basic quality of your photos by applying a comprehensive edit. This includes boosting the colors, saturation, contrast, and clarity.

This Template even utilizes the Sky Enhancer AI tool; therefore, it could be a great choice for landscapes or cityscapes with prominent skies. As you can see in the example photo, the blues of the sky really stand out!
How to Install Luminar AI Presets
If you want to use free Luminar presets, you must first understand how to install them.
Considerations
Before installation, be aware that presets in Luminar AI differ from Luminar Neo and Luminar 4. Because Luminar 4 is considered legacy software, old Templates from Luminar 4 will only work in Luminar AI if you already have them installed in Luminar 4.
If you did have them installed in Luminar 4, they should appear in the Legacy Templates section of the Templates tab. However, if you try to download an old Luminar 4 Template, it cannot be installed in Luminar AI.
Also, consider that some presets simply don’t work. We spent hours downloading and testing different presets to create this list, and it appears that Luminar AI has some issues with Template installation. You may find that even if you use one of the two installation methods we share below, the Templates don’t appear in your Purchased directory. We haven’t found a fix for this.
Lastly, valid Luminar AI Templates have the .ltc extension. If you have a Template with a .mplumpack extension, it’s a Luminar 4 Template. As stated above, these can only be migrated from Luminar 4, not installed from scratch.
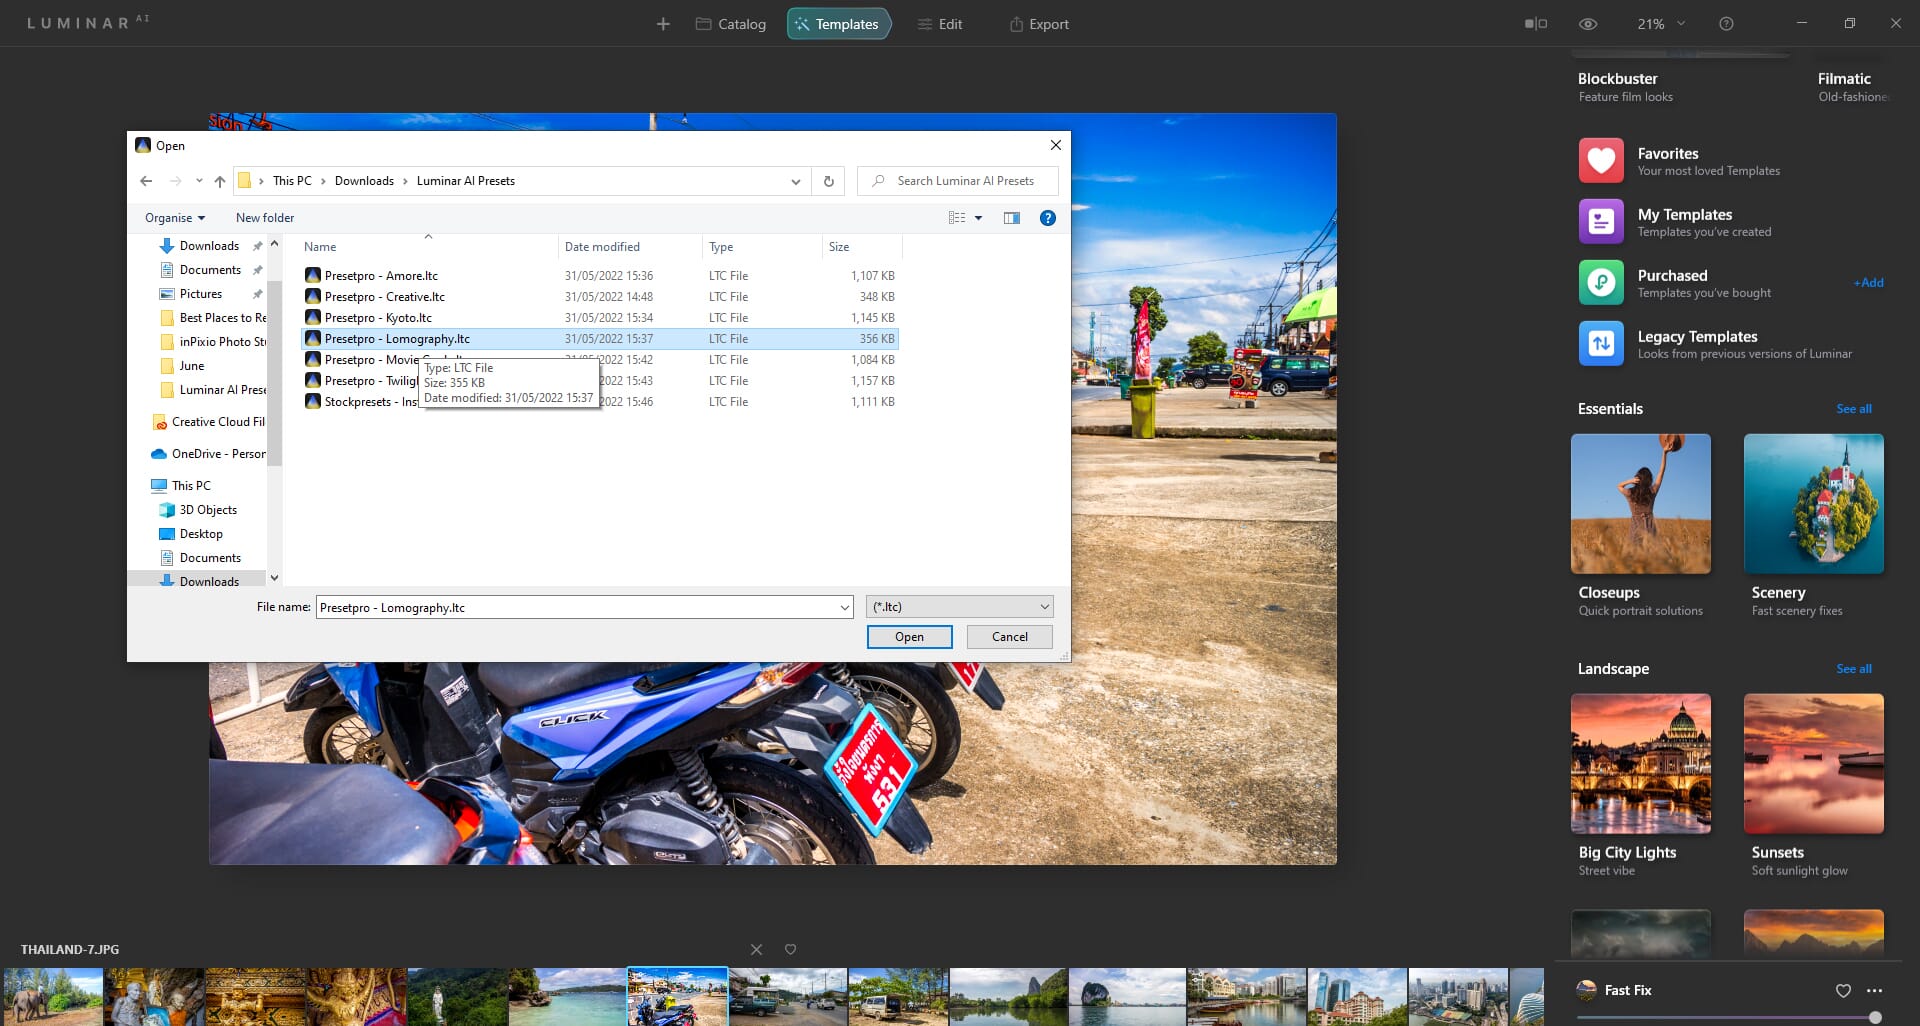
Installation Method 1: Using the File Menu
The first method is simple and uses the Luminar AI file menu. Before following these steps, you must first make sure the .ltc file is extracted and not in a zip folder.
We advise creating a dedicated Template folder in your Luminar install folder to hold all of your presets. This should help keep things organized. Once you download and unzip your new preset, follow these steps:
- Click on the Luminar AI button in the top left-hand corner.
- Hover over File.
- Click Add Luminar AI Template Collection.
- Use the file browser to find the .ltc Template file.
- Double-click on the .ltc file.

This should install the Template file. To see it, open a photo, navigate to the Templates tab, then click on the Purchased menu. You should see the thumbnail of the newly installed .ltc file. Simply click on it, and it will be applied to your chosen photo.
Installation Method 2: Using the Templates Tab
The second method is just as simple. Start by downloading the preset file. Unzip it if necessary. Then follow these steps:
- Click on the Templates tab button.
- Next to “Purchased,” click on the Add button.
- Use the file browser to find the .ltc Template file.
- Double-click on the .ltc file.
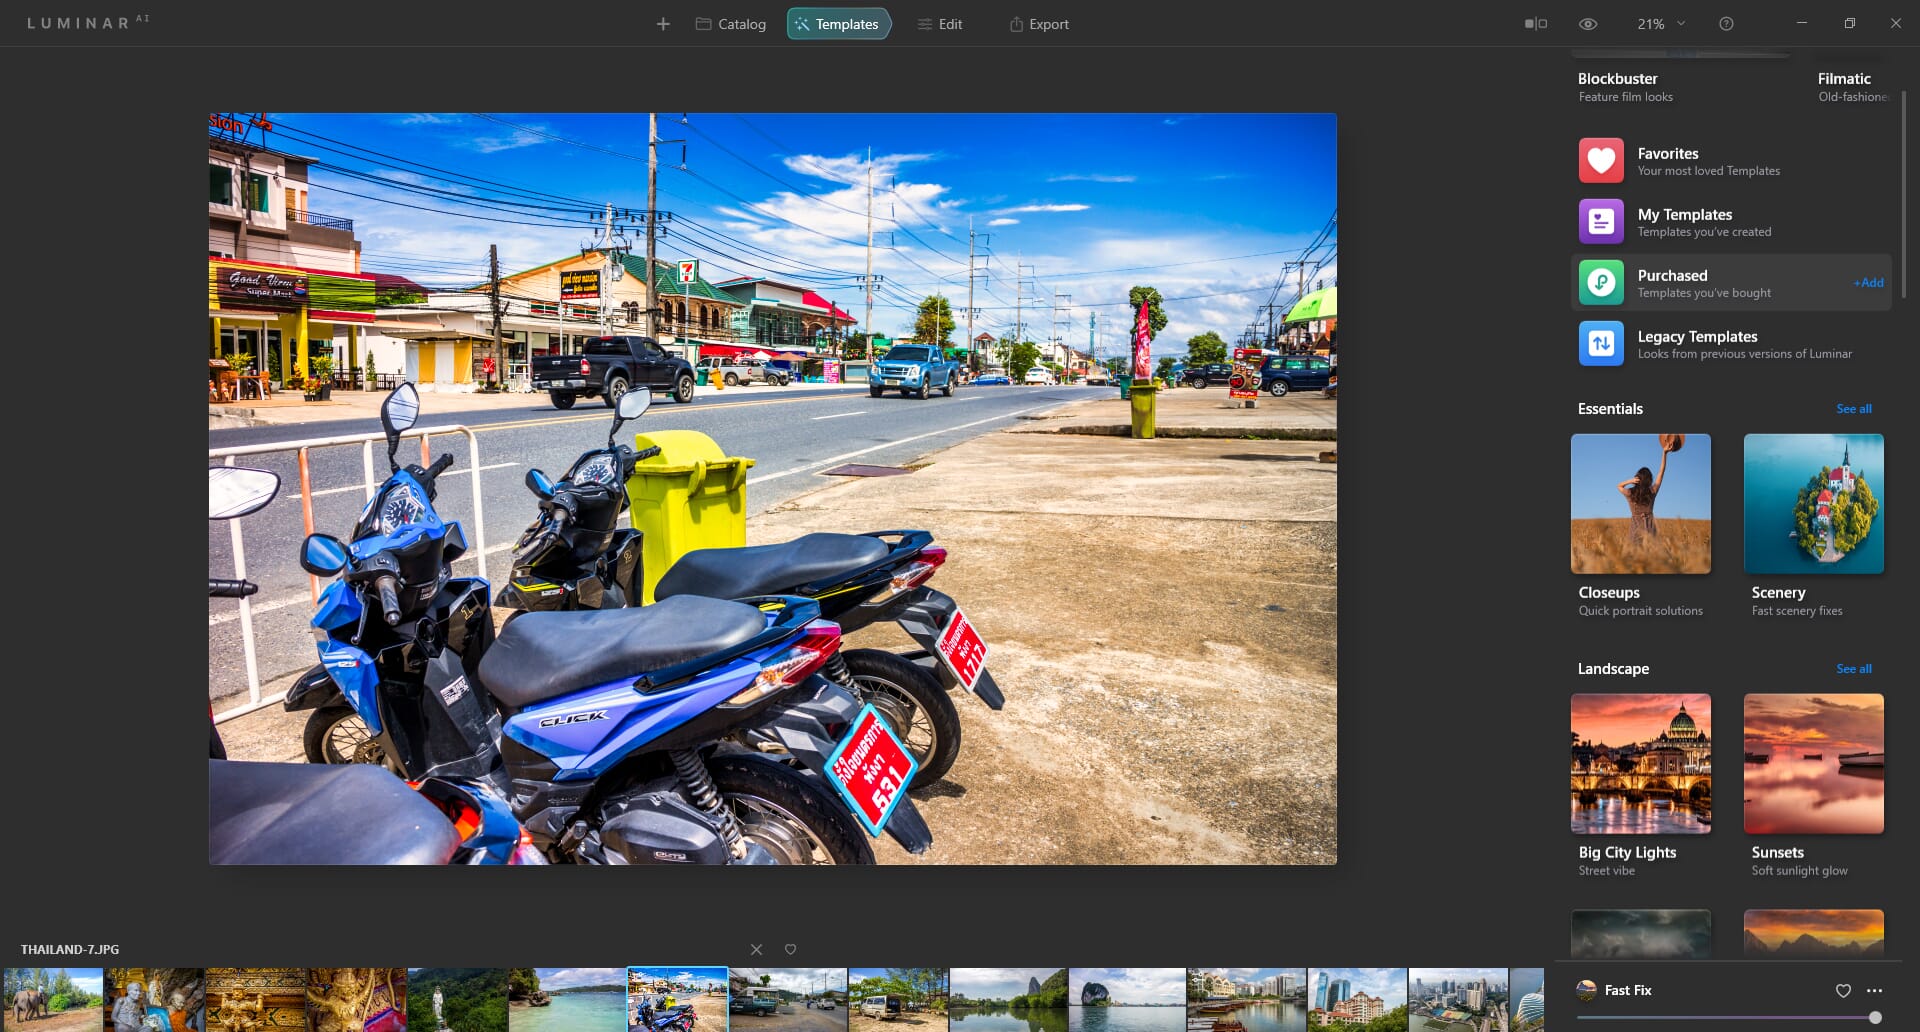
This will install the Template file, and you should immediately see the thumbnail appear for the new Template.
You can identify Templates as favorites by clicking on the heart icon next to the Template name. You can also change the strength of the Template. Simply adjust the slider (it is set to 100% by default).
Use These Luminar Presets to Improve Your Editing Workflow
These free Luminar presets for Luminar AI can greatly improve your editing speed. Instead of spending time changing individual parameters, you can simply select a preset and edit your photos in a couple of clicks. So give some of these Luminar AI Templates a try!